If you have any questions, issues or suggestions, feel free to contact us:
Email: support@flyingbee.com Skype: flyingbee.software Telephone: +18303920398
To use a printer, you must add it to your list of printers using Printers & Scanners preferences. (If you switched from using a Windows computer to a Mac, using Printers & Scanners preferences is similar to using the Printing control panel in Windows.)
https://apps.apple.com/app/print-to-pdf-printer-app/id1639234272
 Quick Start Guide
How to run this app?
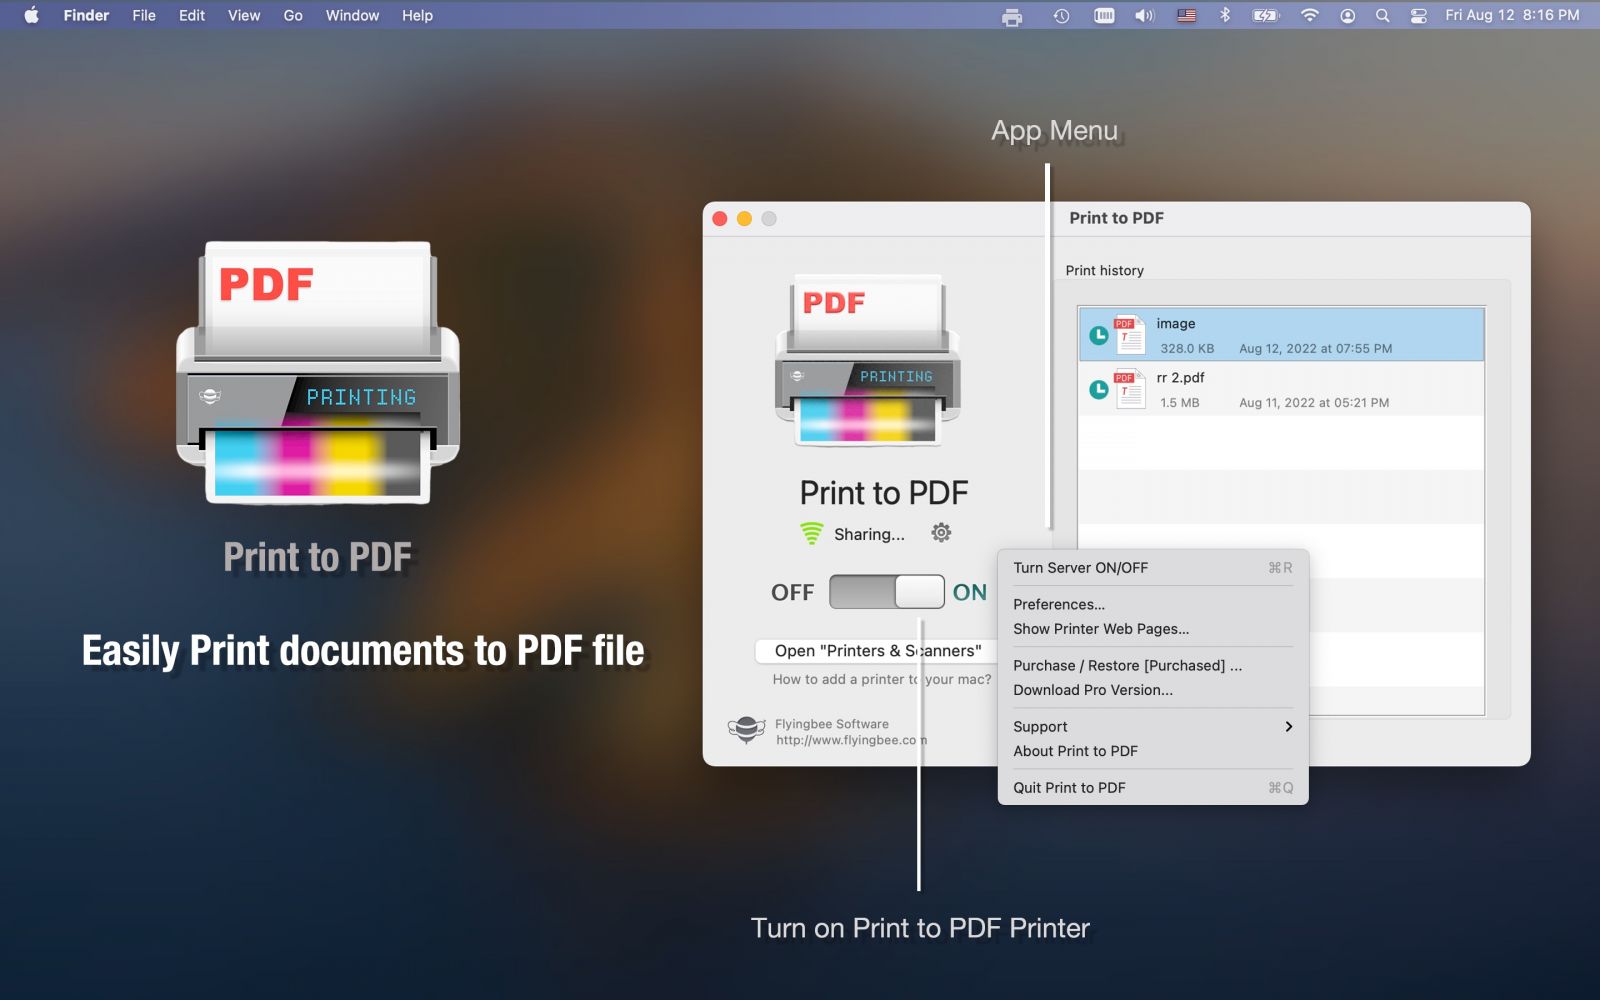
1. Launch the printer app, the app window will be displayed in the middle of the screen.
2. If you close the app window, you can still find the printer icon of the app in the status bar at the top of the screen, and click on the menu to show the app window again.
3. If you want to quit this app, click the printer icon on the status bar and select "Quit Print to PDF" from the menu to exit app.
How to print documents to PDF?
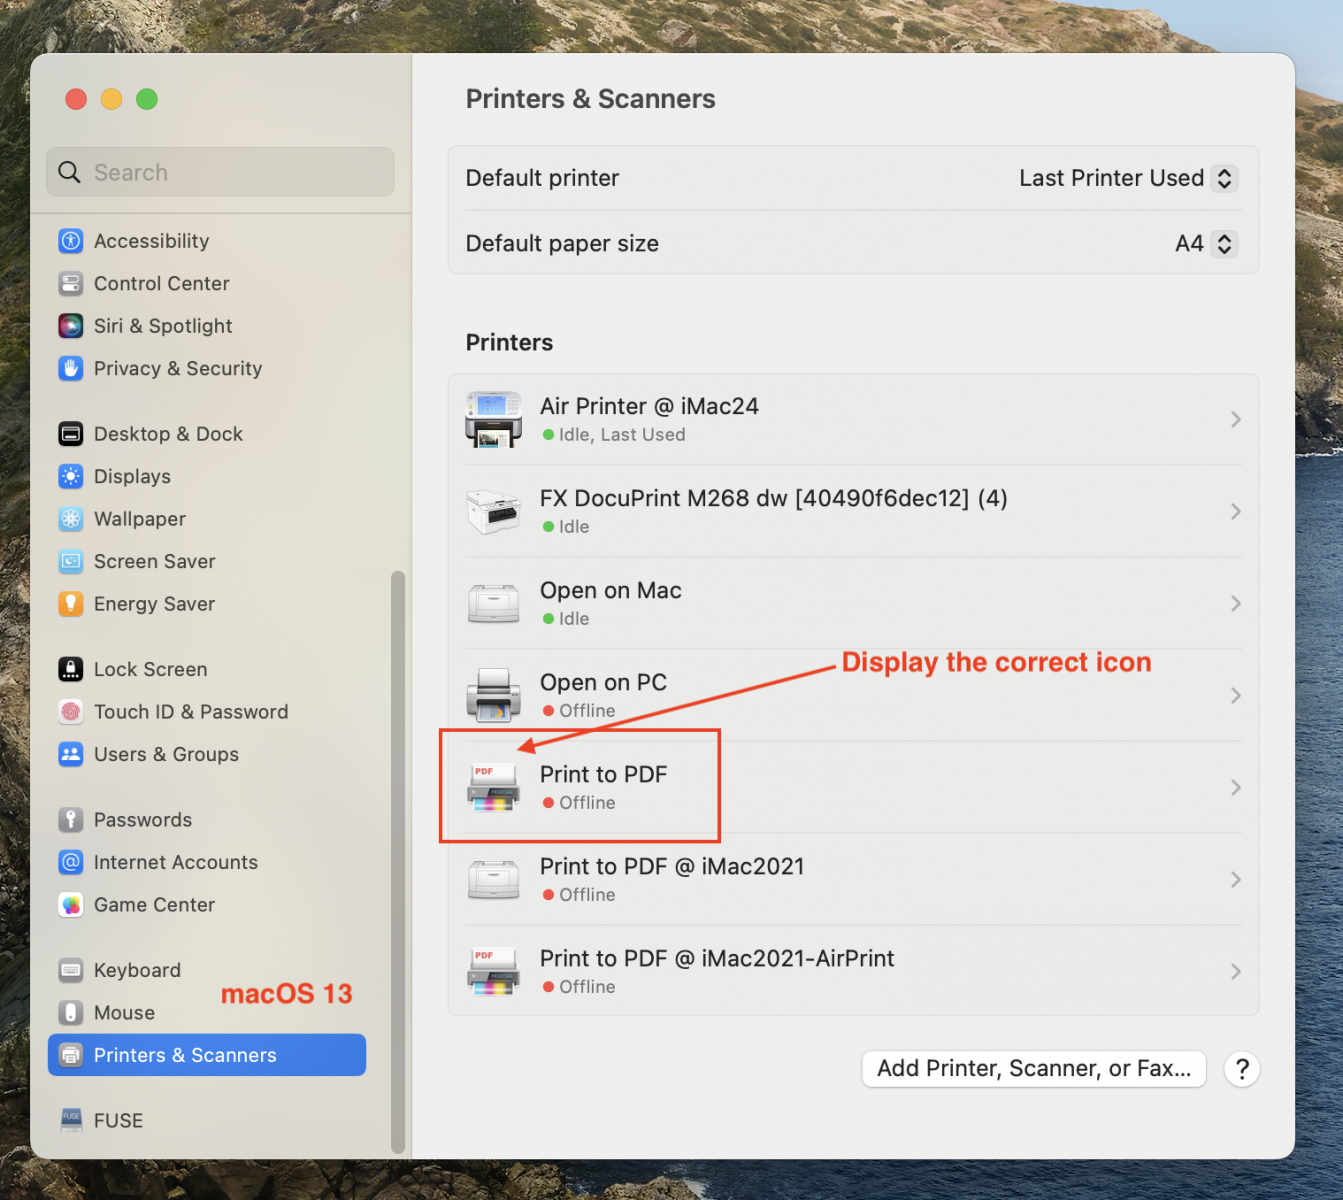
1. After launch the app, go to "System Settings(Preferences)/Printers & Scanners", find "Print to PDF" printer and add it to your system.
(Alternatively, skip to step 2 and install and use the printer on the printing window directly)
2. Try to print any documents on your mac, ensure our printer is selected, the app will simulate printing job, and pop up the generated PDF file automatically.
3. You can easily share printer in the home or company network, archive documents as PDF files, and improve work efficiency.
Let's add a printer to your printer list so you can use it on MacTo use a printer, you must add it to your list of printers using Printers & Scanners preferences. (If you switched from using a Windows computer to a Mac, using Printers & Scanners preferences is similar to using the Printing control panel in Windows.)
In most cases, when you add a printer, macOS uses AirPrint to connect to the printer or automatically downloads the printer’s software (also called a printer driver). Don’t install the software that came with the printer or from the manufacturer’s website; follow the instructions in one of the tasks below, and macOS prompts you to download the latest software if it’s needed.
For information about using a printer with an iPhone or iPad, see Use AirPrint to print from your iPhone, iPad, or iPod touch.
1. After you start the software, you can find the printer in "System Settings(Preferences)/Printers & Scanners" and add it to your system.
.jpg)
 Print documents from your Mac
With a document open on your Mac, choose File > Print, or press Command-P.
The Print dialog opens, with a preview of your printed document. Click the arrows above the preview to scroll through the pages.

Tip: To view a full-size preview in the Preview app, click the PDF pop-up menu, then choose Open PDF in Preview.
If the settings in the Print dialog are fine as is, click Print, and you’re done. Otherwise, continue to step 3.
To adjust the printing options, choose any of the following common print settings (you may need to click Show Details to see more print options):
For more detailed information about printing options, see Set printing options for paper size, paper feed, and more.
You might see different options in the Print dialog depending on your printer and the app you’re using. If these instructions differ from what you’re seeing, check the documentation for the app you’re using by clicking Help in the menu bar.
If you print a document and see unexpected margin sizes or clipped text, there may be a conflict between the margins set for your page size in the app and the nonprintable area of the page set for your selected printer. Try setting the nonprintable area for the page size to 0 (zero). For information about how to set the nonprintable area associated with a page size, see Print on unusual sized paper by creating a custom paper size.
See also


Flyingbee Software
Creative Products
Online Store
Social Connections
We uses cookies to give you the best experience, analyze traffic, and personalize content. By continuing using our Site, you agree to our use of cookies. The information collected might relate to you, your preferences, or your device, and is mostly used to make the site work as you expect it to and to provide a more personalized web experience. However, you can choose not to allow certain types of cookies, which may impact your experience of the site and the services we are able to offer. Read our Privacy Policy or manage your cookie preferences. If you would like to submit an opt-out request with respect to your non-cookie personal information (e.g., your email address), find our support email address to opt-out of sale/sharing/targeting with respect to non-cookie personal information.