PDF is the best choice when creating documents, since PDF can keep your file format and protect the contents from editing and copying. In such case, when you are viewing a PDF document, there might be times that you need to add annotations so that you can mark up some important words or write down your comments and feedbacks. But how to make it happen?
It will be typically easy if you use
Flyingbee Software’s applications. Here in this quick guide, we will explain two solutions to this question.
How to Markup PDF Files with Flyingbee Reader for Mac
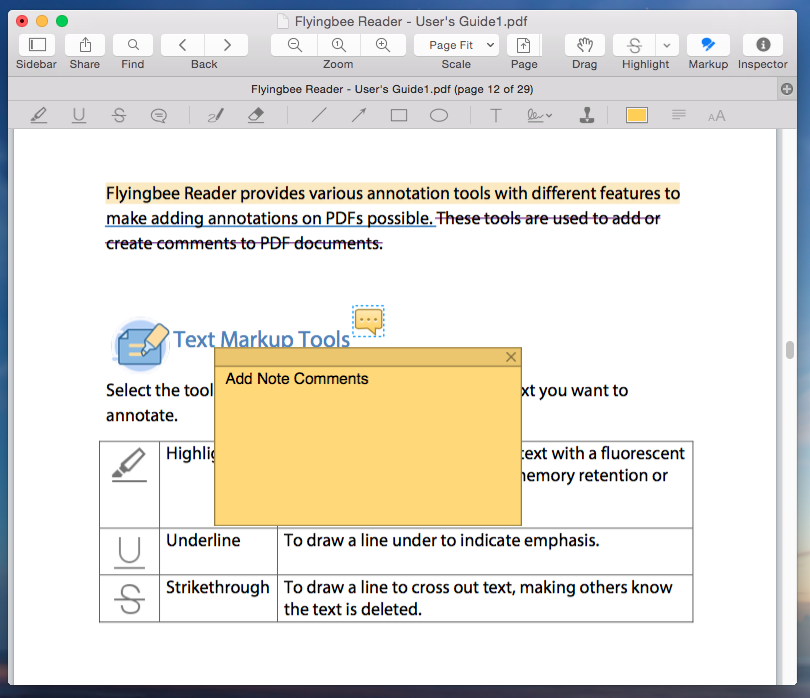
Marking up a PDF on Mac is relativity simple with the correct tools. Here we would like to introduce you to an easy-to-use yet professional PDF viewer and annotator—
Flyingbee Reader for Mac, which can easily help you markup a PDF in your Apple Mac operating system.
There are a number of PDF markup tools that you can choose from in the Flyingbee Reader program. It contains highlight, underline, strikethrough, notes to your PDF document, and the functions for signing, stamping, form filling are also included. For more detail information, please refer to the related articles on the following website link:
http://www.flyingbee.com/support/
How to Markup PDF Files with Flyingbee PDF to Word for Mac
Another solution is to convert PDF files into Microsoft Office Word documents for it has more powerful features to add any kind of annotations in a document.
Flyingbee PDF to Word for Mac is a program to convert Adobe PDF documents into Microsoft Word format with minimum loss of formatting information preserving layout and graphics. Intelligent algorithm of parsing PDF provides high speed of the conversion process.
Now download this PDF converter for Mac to convert PDF to word on your Mac and install it to your Mac. The following is the details on how to convert PDFs into editable Word documents step by step.
Step 1: Import PDF Files
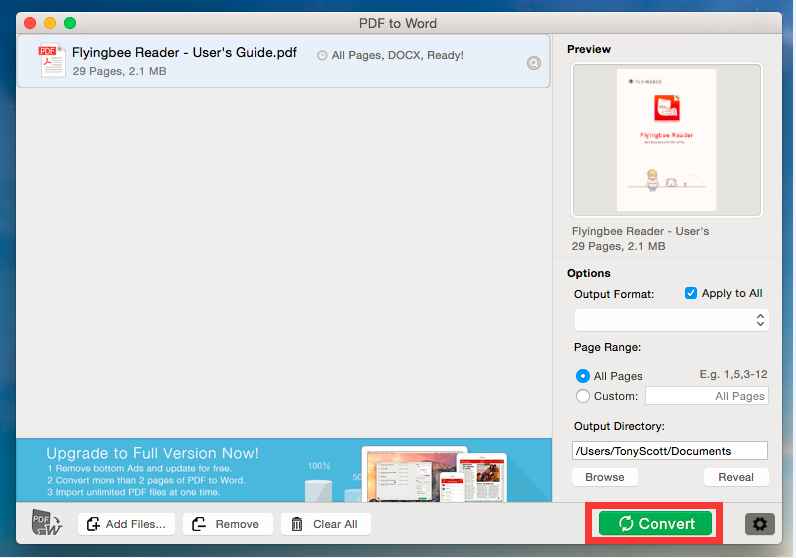
You can add PDF files by clicking the "Add Files..." button or directly drag files into the panel.
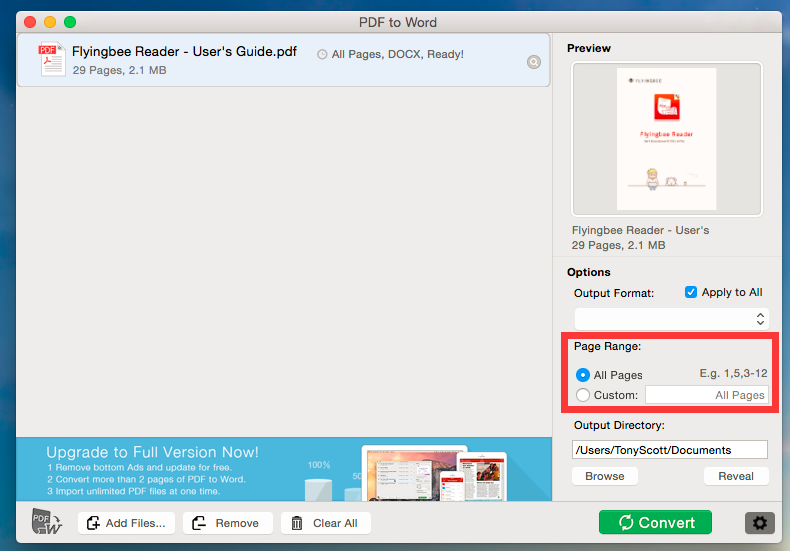
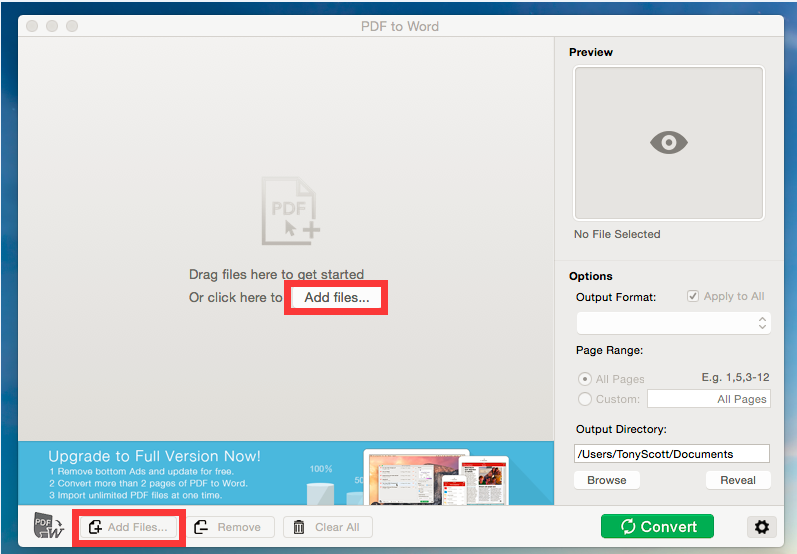 Step 2: Customize Output Settings
You can set the files in the panel individually. Choose a file and click the setting icon and you can set the page range. The default option of page range is All pages. And you can surely choose specific pages or range to convert into word format.
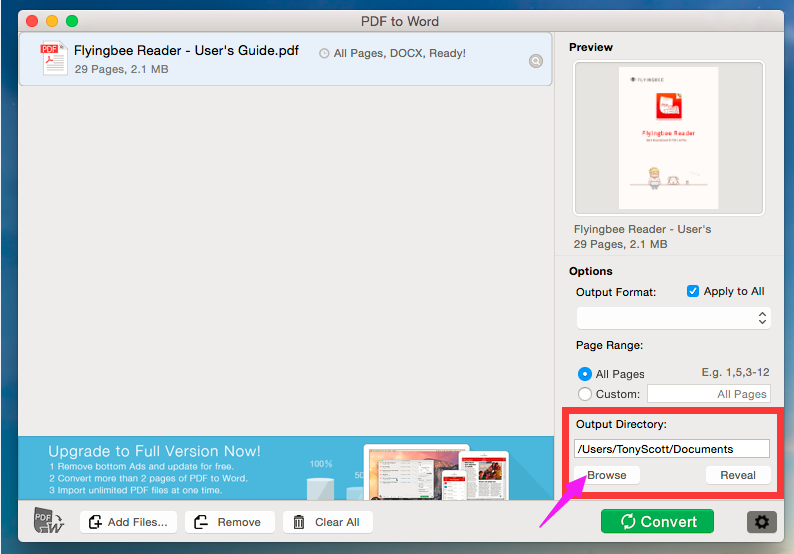
 Step 3: Set Destination Folder
You can set output folder by choosing a saving folder for the converted files. You can click Browse to customize the destination folder.
 Step 4: Convert a PDF File
Click ‘Convert’ button and the file will be converted in seconds. There is processing bar in the process of conversion.
 Step 5: Add Markups in the Converted Document
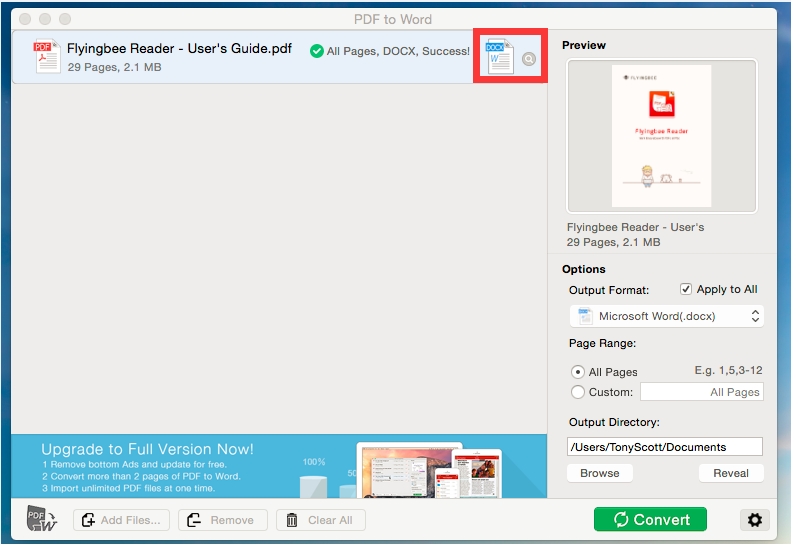
After conversion, you will find that all the original text, layouts, hyperlinks and graphics would be preserved in an editable word document, and then you can edit it as desired with familiar Microsoft Word tools.
Open the document in Word after the conversion(Shown as the screenshot below):
 Tips: Flyingbee PDF to Word for Mac
 is specially designed for Mac users. If you are a windows user, you can use
Flyingbee PDF to Word for Windows, which can convert PDFs with all text and graphical data and images into Word format.
Flyingbee PDF to Word for Mac is a comprehensive PDF tool to help Mac users convert PDFs to Microsoft Office Word so that Mac users can flexibly edit or annotate PDF files.It offers many amazing features: Good preservation; high efficiency; flexible options; quick conversion speed and bath conversion modes. So
DOWNLOAD FLYINGBEE PDF TO WORD FOR MAC to make an editable word document.


